Here are some fun nugget six packs that I have been working on. Each little "tote" holds 6 nuggets and can be decorated any way you like. I've chosen to use some retired product but you can use whatever you have handy to make these cuties.
Here is a little bit more of a close up and you can also see the back where the remaining 3 nuggets are nestled in. So - for the directions - here we go!
Start with a piece of card stock cut at 8" x 4". You will score these on the long side at:
1", 1-1/2", 3", 5", 6-1/2" and 7".
Flip the card stock over and score it at 4" on the reverse side. This is just so your scoring will go in the directions that you want to fold the card stock.
Now turn it and score it at 1/2" at each side of the 4" side of the card stock.
Cut up to the scored lines as shown and cut out the middle pieces as shown.
Flip it over and add Tear and Tape at these locations.
Now as you fold them up you will get a pocket like this. You will have the larger taller part on the outside.
When you do the other side, it will look like this.
Now turn it over and add Tear and Tape at these locations. One at the bottom, and one on each side of the scored line. Try to keep these last two as close to the scored line as possible.
When you take the Tear and Tape off and attach the two ends, this is what you will be left with.
Now, trim off the ends going from the front flap up to the scored line.
When you get all 4 corners cut off it will look like this.
I know our Word Window Punch is retired but this is the best tool for this job. Push it in all the way. Yup, part of your punch will be inside the pockets you have created. But it will work just fine. Punch out that handle.
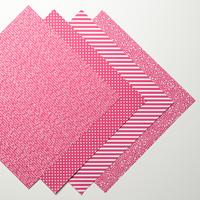
This will be what you will end up with. Now you can decorate it any way you want to. For your measurements, for the outside of the tote the Designer Paper that I used was cut to 2-7/8" x 7/8" and to wrap the candy I cut that paper to 1" x 3".
Hope you have fun creating your own nugget six packs!
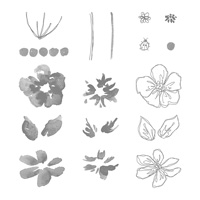
This is one of those bright and cheery cards. We all need some of them in our lives. I have a tip for you for when you use these triple step flowers and want them to be random looking but don't want to stress out about how they all line up. These photopolymer stamps have a little arrow that helps us line them up as you stamp the layers so I think of a clock and starting with the black outline, I stamp the first flower with the arrow pointing to 12 o'clock. I then turn my stamp for the next flower so that the point is at 3 o'clock. My third flower is pointed at 6 o'clock and my fourth flower is pointed at 9 o'clock. So now when I come back with the next color I go back to the first flower I stamped and go to 12 o'clock with the arrow and just follow the pattern as I outlined above. It makes lining them up easy peasy!
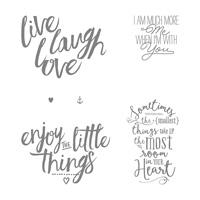
I used our Stampin' Write markers to color in the heart from the sentiment. The black baker's twine is tied around the layer of Basic Black with the polka dots and the stamped flowers.
You know me, I have to do something to the inside of the card so here is what I did for this card.
And now I have a cheery card ready to make someones day. :-)
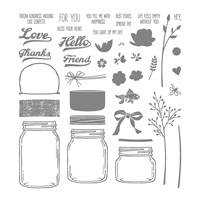
This card just takes me back to playing in the back yard as a kid in the dusk. It's just plain fun. I started off by stamping the leaves on the bottom of the card in Garden Green ink then made my three dots of crushed curry so I knew where my fireflies would go. I then sponged all over the Whisper White card stock in the Indigo Island ink to give it the feeling of dusk making sure to keep the area around the firefly dots cleared.
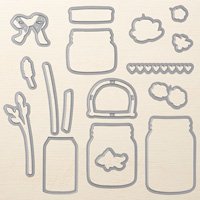
I then stamped the jar & lid three fireflies on some scrap pieces of Whisper White and cut them out using the Big Shot and the corresponding dies. They got lifted up with Stampin' Dimensionals.
One more firefly for the inside of the card and we are GOOD TO GO!
CASED from Becky Jensen.
I had a lot of fun with this card but I felt like I had every stamp pad I owned out on my desk as I was making it. I love the 3 step stamping so it is so worth it.
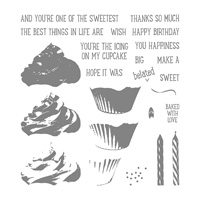
I started with the cupcake base and then moved up to the icing. I then stamped this image on a post-it note, cut it out and placed it over my stamped cupcake so I could sponge around it to give it some sense of grounding so it wouldn't look like my cupcake was floating in air.
The word "WISH" is stamped on Night of Navy card stock using VersaMark and then heat embossed using White Embossing powder. It just makes it pop a little more.
Speaking of "popping" the camera cannot do it justice but I came back over the icing with our Wink of Stella in clear and WOW does that look great! It makes it so you just want to bite into that cupcake!
Here is what I did to finish off the inside.
I received a version of this card at a swap and I wish I knew who had made it to give them credit but sadly I don't know their name. Whoever you are that gave me this card - THANK YOU!!